Hello everyone! This is a friendly reminder that any of these fun places we may visit, we are a guest at. Please treat both businesses and trails with the utmost respect. We here at Hidden California follow the 'Leave no Trace' mantra, meaning whatever you bring with you comes back with you. If you see trash on a trail, please do your part to help remove it. Remember, we are not picking up trash from another person but instead cleaning up for Mother Nature. Happy adventures!
Santa Catalina Island
CA 90704
33.386613, -118.419936
Dog-Friendly: Yes Kid-Friendly: Yes
About the Trans Catalina Trail System
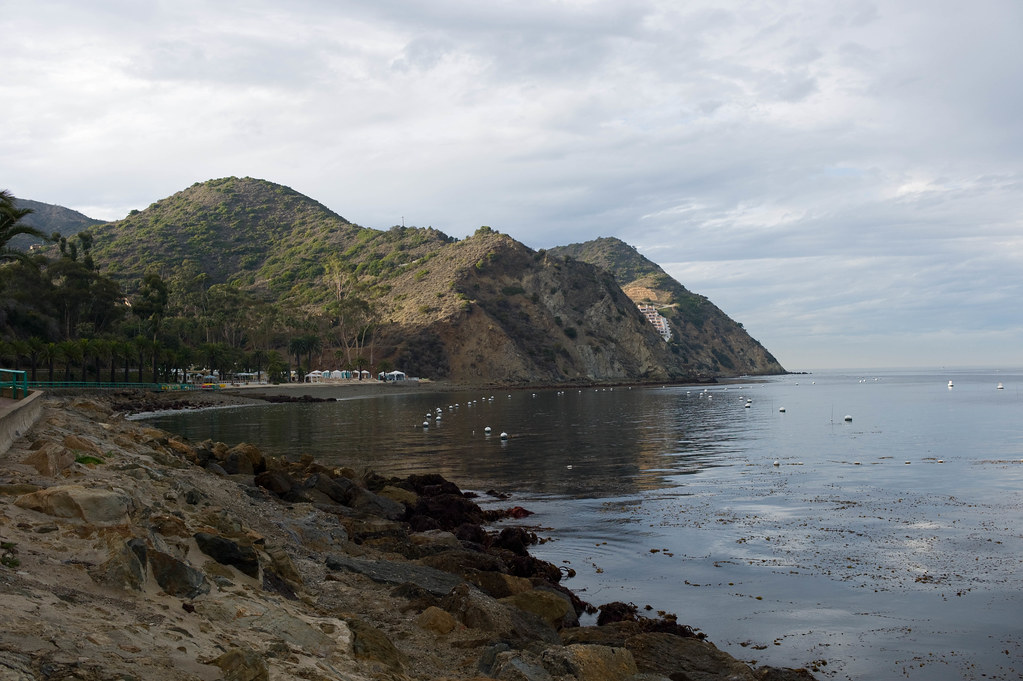
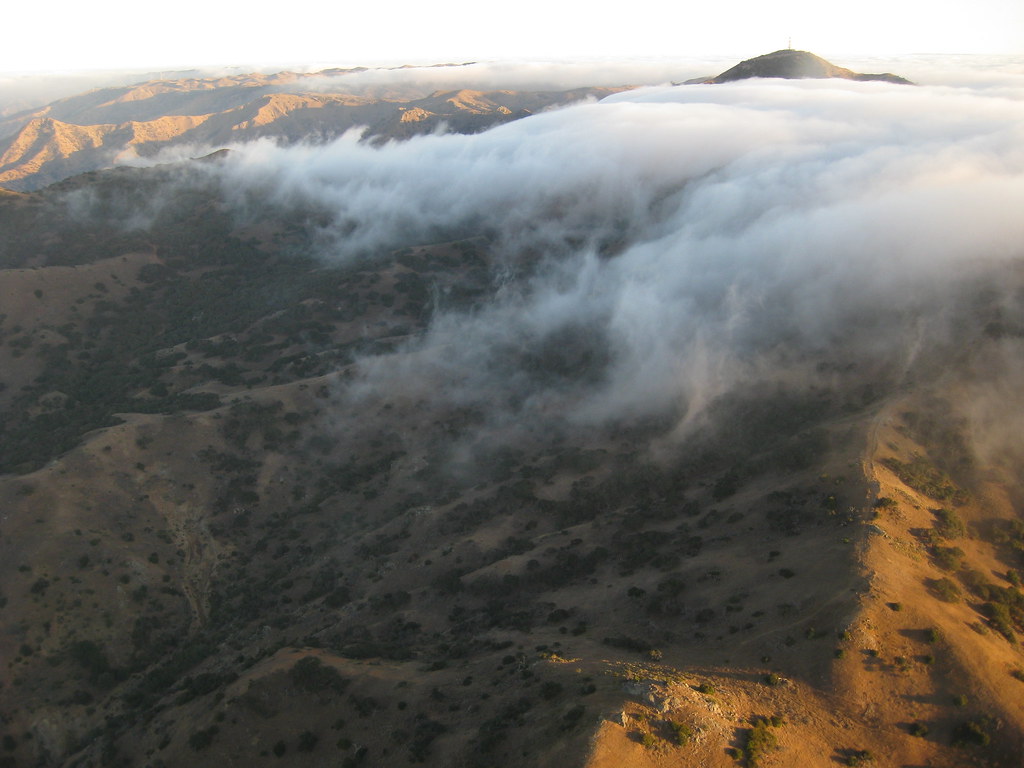
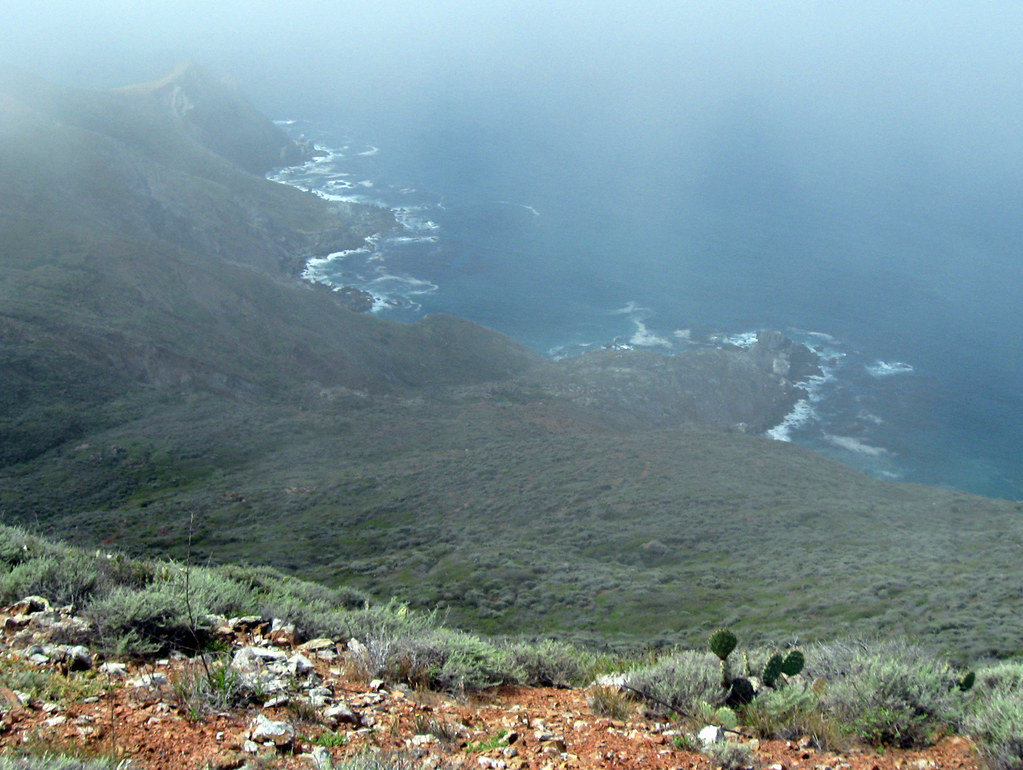
Article by Tyler Buck: On a whim, I decided to backpack all of the Trans-Catalina trail system (TC). The TC is approximately 37.2 miles long and takes you across the entire island. On the Trans-Catalina you will encounter breathtaking cliff sides, remote beaches, stunning views from summits, rolling grassy hills, and even buffalo!
I noticed many blogs and posts did not provide sufficient information for planning and difficulty of the the hike. Below I take the liberties of detailing the planning, equipment, and cost of hiking the TC.
The trail highlighted in yellow, takes you from Pebble Beach to Starlight Beach in a little more than 37 miles. Be aware you will be backtracking 4.5 miles back to Parson’s Landing and add an additional 6 miles or so from Parson’s Landing to Two Harbors. The total trail mileage will be about 48 miles.
While you’re in the area, make sure to visit Pimu Eco Village nearby!
Getting to Catalina Island via Catalina Express

The ferry is the most typical way to getting to Catalina. The Catalina Express departs from Dana Point, Long Beach, and San Pedro. The ferry takes approximately 70 minutes. Only the ferry from San Pedro goes to Two Harbors. Long Beach and Dana Point go to Avalon.
Catalina Ferry Fees and Schedule- The ferry costs $37.25-$38.25 each way. If you are unsure of when you will return or how long the hike will take you, don’t feel pressured to book a roundtrip. The cost will be the same whether you book a one way or roundtrip. However, note that during peak seasons the ferry may fill up and you may not be able to purchase a ticket the day of, so plan accordingly.
During winter months the ferry will only run two or three times a day. If a hike takes longer than expected, you can always change your ferry ticket 24 hours in advanced for free or pay a $5.00 fee at visitor services if you need to change your reservation at last minute.
**Preparing for Catalina**
Cell Phone Reception- Cell phone reception is limited in Catalina. You will have cell phone reception at most of the campsites, Two Harbors, and Avalon. This of course depends on your carrier. I’ve heard Verizon is best followed by AT&T. I carried a rechargeable phone case and two external battery packs.
Endurance- Catalina isn’t a flat island. In fact at many points of the trail, you may climb a thousand feet in less than a mile. What makes Catalina difficult is the absence of switchbacks. Switchbacks are designed to allow for an easier elevation climb and descent by way of gradual elevation change. When ascending and descending the TC is a series of very steep hills. Below is a picture of the elevation change you will experience on the TC.
Dangers- Dehydration and exhaustion will be your biggest concern. The island is very dry (so don’t bother bringing your life straw or water treatment) and water is only available at most of the campgrounds.
Potable Water Locations-
Hermit Gulch Campgrounds
Haypress Recreational Center — mile 9
Blackjack Campgrounds — mile 14
Airport — mile 16
Little Harbors Campground — mile 21
Two Harbors Campground — mile 26
Parson’s Landing Campground (2.5 gallon container only with campground reservation and $20.00 locker fee) — mile 33

Wildlife Encounters- Catalina is home to Southern California wildlife. Besides the rattlesnake, an animal to approach carefully and cautiously is the American Bison roaming the conservation lands. I encountered a bison on the trail on my way back to Parson’s Landing. Upon passing this monstrous animal on the trail, he proceeded to charge me. I quickly jumped off the trail as he carefully watched me. Luckily, there was a group of hikers on the nearby cliff side. We were able to chase the Bison off the trail. Below is a list of “dangerous animals” on Santa Catalina island:
* Southern Pacific Rattlesnake
* American Bison
**Packing for Catalina**
I traveled to Catalina in February. The weather was hot during the day and cool and night. Every oz. counts when ascending and descending steep hills. Pack according to the weather forecast and your comfort level.
This is the gear I took with me on my 5 day trip on the TC:
Backpack- I would recommend at least a 40L pack. I used a ULA Circuit ($225) It is an ultralight pack very commonly used on the PCT. When packing be sure to pack heavy items closest to your back and in the center of the pack. Any items that you believe will be used during your hike keep on outer or side pockets.
Tent- For one person I carried a Passage One ($139 + $20 footprint) from REI. A trash bag is recommended for use when the morning dew collects on the rain fly of the tent.
Hydration- I used a Platypus 3L hydration bladder ($36.95). I also carried a collapsible water bottle ($8.00) and packets of sports drink for electrolytes.
Sleeping Bag & Sleeping Pad- Any portable sleeping bag will do. Catalina does not get very cold at night. In fact you will be likely be too hot with a zero degree rated sleeping bag. I used a semi-light compact $40.00 sleeping bag from Amazon.
Light- I recommend a headlamp of any sort. I used a Black Diamond Headlamp.
Cooking system- Everyone has their own preference based on weight and ease of use/cost of fuel. I recommend a JetBoil MiniMo ($139). A 100g fuel canister will suffice for one person for the length of the trip. The Catalina Express prohibits flammables but as far as I know there is no screening of bags. If you bring dehydrated food you will need a stove to boil water. This also doubles to make coffee in the morning and hot chocolate in the evenings.
Cooking on the Trail- I tried freezer bag cooking for the first time. My proportions were way too much and my zip lock bags were too large for the amount of food. That being said, I enjoyed the ease and no cleaning aspect of freezer bag cooking. Simply follow recipes such as here and write in permanent marker what the food item is and how much water is required.
Clothing-
* Two Short-sleeved t-shirts
* Two pairs boxer briefs
* Under armor thermal
* North Face Jacket
* Two extra pairs of socks
* Board Shorts
* Hiking Pants
* Hiking Boots/ running shoes (it’s possible to hike Catalina in running shoes)
First Aid Essentials
* Chapstick
* Mole skin for blisters
* Band aids
* Ibuprofen
Misc.-
* Sunscreen
* Hat
* Sunglasses
* Board Shorts
* Spork eating utensil
* Baby wipes
* External battery packs for phone
* Toiletries (tried using dry shampoo to avoid cold showers in the morning)
* Lighter and fire starting kit
* Hand sanitizer
Comfort Items
* Coffee is a must have for me. I would recommend a lightweight titanium mug from REI and Starbucks Instant coffee.
* 2 x 8 oz. flasks
* Hot sauce
* Sandals
* MP3 player loaded with podcasts
Weather
January through March- Cool and “rainy” season. Typically a high of 65 and a low of 50. Particular campgrounds like Parson’s Landing and Blackjack may be windy, so there may be a “windchill” factor. I placed rainy in quotations because like most of Southern California, Catalina does not receive much rainfall. The average rainfall during these three months is only 3 or less inches. Check the forecast for rain. Carry a poncho and pack cover if necessary. At night be sure to have a sweatshirt.
April through June- The weather is a few degrees warmer and there is a less likely chance of rain. Like anywhere in California, there is always a chance of a heat wave in these months.
July through September- The weather will be “hotter.” Average temperature will be 75 degrees and a low of 63 at night. In certain valleys and sides of the island, it will feel much hotter. A long sleeve shirt for the night may suffice.
October through December- The same weather as January through March with a lesser chance of rainfall.
Reservations
Catalina’s busy season is from June to October and is especially busy during the peak of summer and holiday weekends. Low season is from December to February. Weekends are usually always busier than weekdays year-round. Source.
You may need to reserve campsites several months in advance. Some of the campsite areas are only have 8 sites available. When I visited in the beginning of February 2015, I booked my campsites the night before my ferry departure. Only one campground was completely full, but this was because of a friendly group of Christian retreaters had booked the entire grounds that night. Book your campsites here.

Campgrounds- I’ll avoid repeating the information listed on the website. Below is just some helpful hints that may not be apparent or written on the website.
Hermit Gulch- The campgrounds is located 1.5 from Avalon. Be prepared for a nice gradual uphill walk to the campgrounds. Find summer street follow towards the botanical gardens. Check-in at the ranger station. This will be the most well maintained campground during your stay on Catalina. The ranger in charge is very friendly and has done an outstanding job with upkeep at the campground. The showers are cold and require quarters.
Blackjack– Blackjack is often the first or second night of the trip if you start in Avalon. There is a cool mountain breeze and the campground has a San Diego inland mountain feel to it. There is plenty of shrubs and trees nearby to relax away from the campground. Check in at the Hotel Atwater (located on summer street in Avalon) or the Two Harbor’s visitors center. If this campground is booked full you may be able to walk a hundred feet off trail and find your own place to camp. Watch out for wild bison roaming through the campgrounds.
Little Harbors- Little Harbors is an excellent beach campgrounds. During my trip, I stayed two nights here and spent most of the day relaxing. Campsite number 10 has an excellent view of the beach as well as a shade cover. During the off-season if the campsite is full or you neglected to make reservations some hikers like to camp next door on the beaches of Shark Harbor.
Two Harbors- The campsite is next door to the small town of Two Harbors. During off-season the grass is overgrown and the campsites can get very wet in the morning. Be sure to bring a plastic bag to place your rain cover/tent in to avoid getting the rest of the items in your pack wet. Check-in is at the Two Harbor’s visitors center. Nearby in the town of Two Harbors is Harbor Reef Restaurant and Bar. Be sure to try a Buffalo Burger and a local drink specialty called Buffalo Milk. Two Harbors also has a very expensive market that caters to hikers where you can resupply. Expect to pay two to three times the amount you would normally pay for items.
Parson’s Landing- The campsite is often your last night in Catalina. Some spend two days here in order to make the tough hike to Starlight beach. You must check-in at Two Harbor’s visitor center. There, you will receive a campground assignment and a locker key for 2.5 gallons of water and a small bundle of firewood. Remember, there is no potable water available at Parson’s Landing. Many of the sites are not numbered. The sites begin at 1 on the far right and continue to 8 to the far left. Although illegal, it may be possible to camp on the cliffs of Starlight beach.
Suggested Catalina Itinerary- Here is my suggested itinerary. During the “off-season” the campgrounds may be empty and very quiet, so why rush?
**Day One**
Morning ferry to Avalon
Take the morning ferry to Avalon so you can spend some time in the charming small “city” of Avalon.
Hermit Gulch Campgrounds- Walk a 1.5 up to Hermit Gulch. Drop off your pack and set up camp at your assigned campsite. Take a taxi or walk over to Pebbly Beach to the beginning of the TC. With a day pack, hike 5-6 miles to either the Wrigley Memorial Botanic Garden or the Hermit Gulch trail back down to Hermit Gulch campsite.
If you take Wrigley Memorial, you’d skip less than a mile of the TC but you’d be able to check out the architecture and gardens below. If you forgot to pick up a trail map, you can purchase one at the admissions of the Botanic Garden. There you can also pick up beverages and snacks. Some people choose to forgo the first 6.5 miles and begin their TC adventure beginning at the top of Hermit Gulch trail.
Day Two
Hike the Hermit Gulch Trail to mile 6.5 on the TC (1.7 miles)- The Hermit Gulch trail is an ass kicker. Be prepared to climb a thousand feet. The Hermit Gulch Trail is 1.7 miles and may take some longer than two hours to complete. Here, you’ll get your first taste of the steepness of the TC. At the top of the trail is a bench which is a great place to catch your breath and relax before continuing on the actual TC.
TC (mile 6.5) to Haypress Recreational Center (2.5 miles)- Make your way on the TC to Haypress Recreational Center. You’ll quickly notice that the TC is very well marked. Just follow the signage. Haypress is a great place for a break and be sure to refill your water bottles or hydration system.
Haypress RC to Blackjack Campgrounds (5 miles)- The remainder of the TC to Blackjack is relatively steep and gets very hot during mid-day. There is a grueling hill right before Blackjack campgrounds. Here you may choose to spend the night or continue to Little Harbors. If you choose to continue onto Little Harbors you can stop for lunch at the Airport in the Sky (mile 16).
Day Three
Blackjack Campgrounds to Little Harbor Campground (7 miles)- Follow the TC west to Little Harbor. Since I did not camp at Blackjack campgrounds I took a mile shortcut and traveled Upper Cottonwood Road and up Escondido back to the TC on Sheep Chute Rd to Little Harbor. This trail was mostly downhill except for an uphill portion near El Rancho Escondido.
Day Four
Little Harbor Campground to Two Harbors Campground (5 miles)- The hike from Little Harbor to Two Harbors is very steep. The hill out of Little Harbor is rather grueling. Take your time to enjoy the scenery if you are planning on staying in Two Harbors as the hike is only 5 miles. If you choose to skip Two Harbors and spend two nights at Parson’s Landing then add another 6 miles to your hike. I think Two Harbors is a great place to stay and hit the only bar in town and meet some locals, tourists, and fellow hikers.
Day Five
Two Harbors to Parson’s Landing (7 miles)- Make your way out of the town towards Catalina Harbor. At mile 27, be prepared to climb an intense hill. Pray the weather is cool because this part of the hike will kick your ass. The TC does not begin a descent until approximately Fenceline Road Junction road at mile 30.7. The descent to Parson’s Landing is steep.

Parson’s Landing to Starlight Beach (4.5 miles)– Drop off your pack and pick up your locker key. Do not decide to forgo the locker and water resupply unless you plan on skipping Starlight Beach. Even then, be prepared to carry at least 8 liters of water. With a day pack, make your way out of Parson’s Landing and back onto the TC to Starlight Beach. The elevation gain is deceptive here. There are many rolling hills and also some of the steepest parts of the TC on this last stretch to Starlight Beach. At Starlight Beach be sure to make your way down the cliff side and dip your feet into the black sands and incoming waves.
Starlight Beach back to Parson’s Landing (4.5 miles)- Be aware that Parson’s Landing gets very windy. Be sure to take advantage of the build rock formations and be sure to stake your tent in firmly.
Day Six
Parson’s Landing back to Two Harbors (6.5 miles)- Head towards Emerald Bay on the TC and end up on West End Rd. There you will take a very flat road passing private camps on the way back to Two Harbors. I would comfortably give yourself three hours for this last stretch of hiking to ensure you make your ferry on time.
Budget Example- Average Campground Cost per night: $23.00 + $20.00 for water and firewood delivery at Parson’s Landing.
Round trip Ferry Service: $75.00
In-Town meals: $15.00-$20.00
Cost of Cooking on the Trail:
Breakfast: $2.00- $8.00
Lunch: $ 3.00- $9.00
Dinner: $ 4.00- $9.00
Total for 4 nights, round trip ferry service, and cost of cooking on the trail plus a meal at Two Harbors would be approximately $ 200.00.


